Last summer I gave a workshop on digital visual practitioning at the EuViz Conference together with my Finnish colleague Raquel. Now Raquel continued the saga by giving The Thriving Digital Visual Practitioner workshop in Copenhagen. In the workshop they focused on the possibilities that digital tools and methods can provide to a visual practitioner. Raquel started off her visual practitioner’s career with pen and paper but I guess she works more digitally nowadays.
When Raquel was planning out her workshop she asked if she could beam me up via Zoom so that I could tell about my digital experience – the only kind of experience that I have. It’s namely a w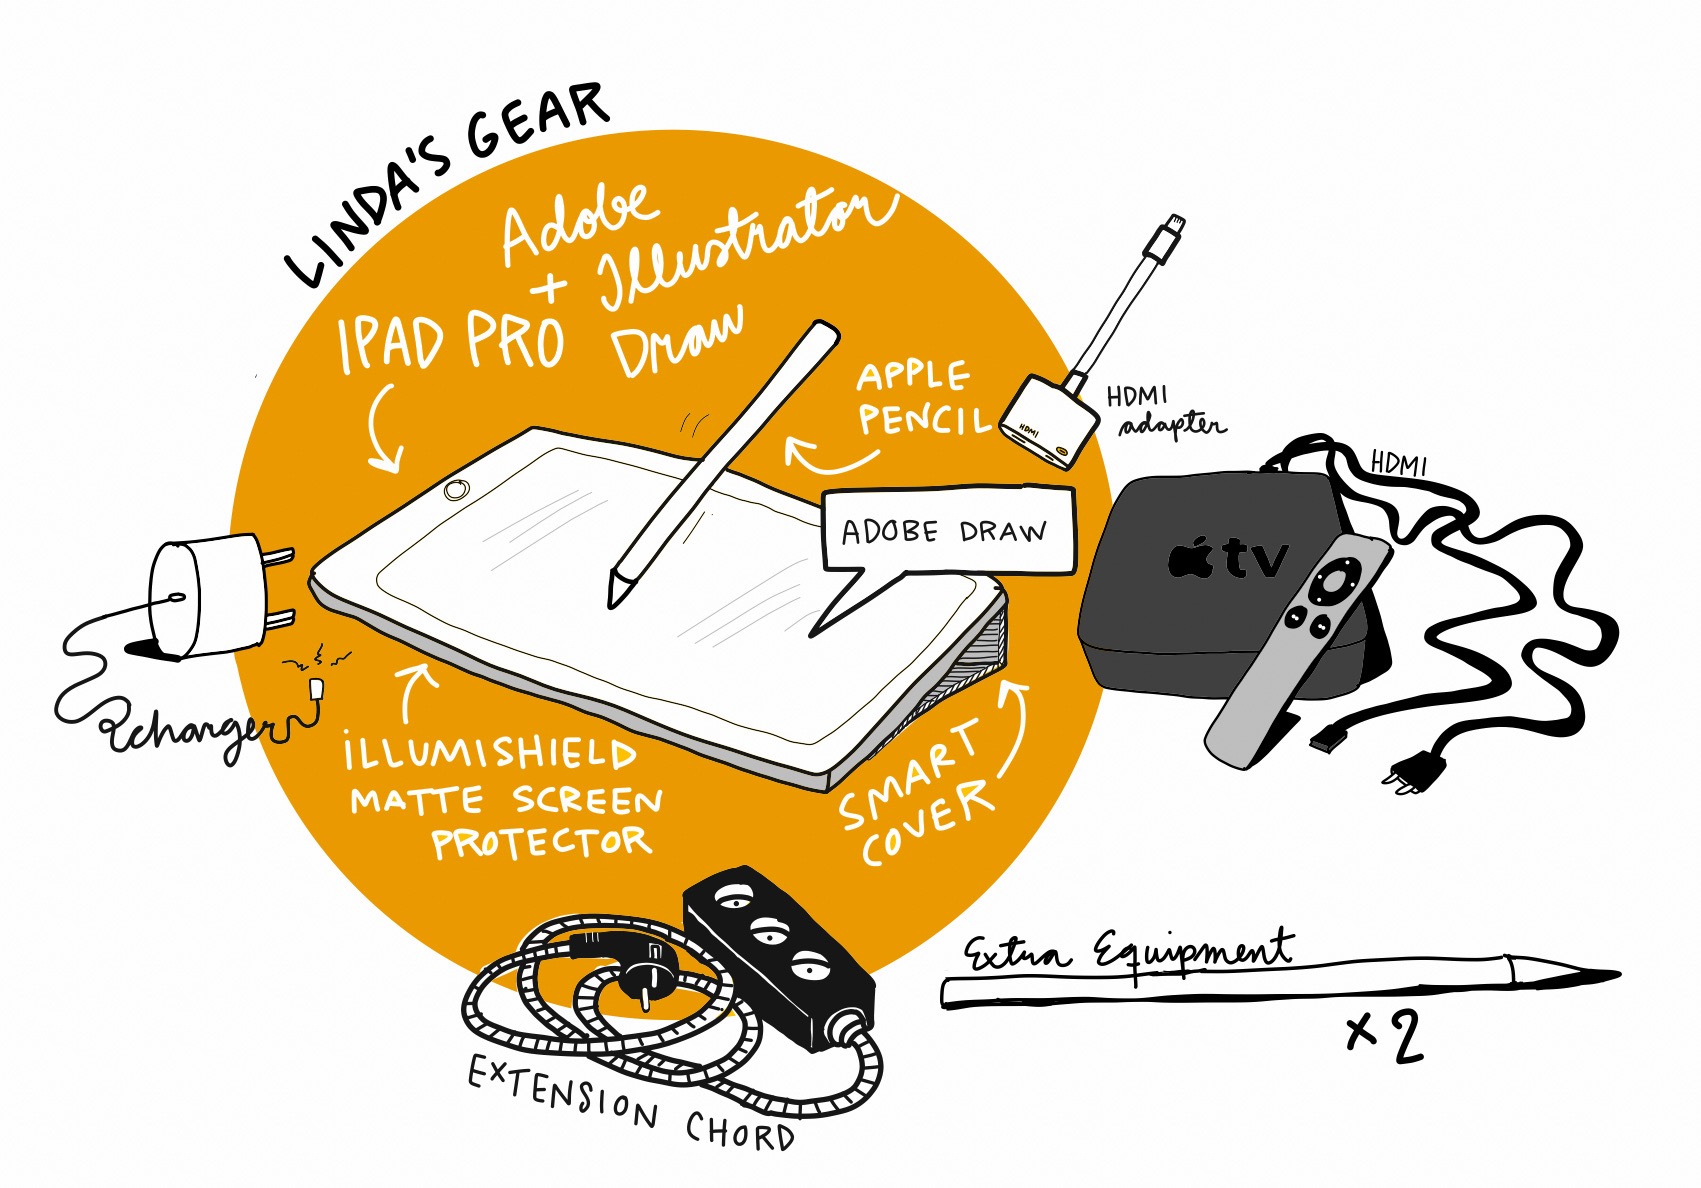 ell-known fact that I am a fully digital visual practitioner. I’ve never done professional graphic recording on paper, it’s been digital all the way, throughout the nearly (or is it over?) 250 events I’ve covered since buying my first iPad in 2010. Of course during my years as a language teacher I mastered the black and white boards in classrooms but hey, that doesn’t count, does it? :)
So we opened the Zoom connection and I told about my workflow; what I do before the event, during the event and after the event. Zoom is by the way a great tool to show the screen of one’s iPad: you can share the iPad screen both with a cable and without one.
Here’s my workflow in short:
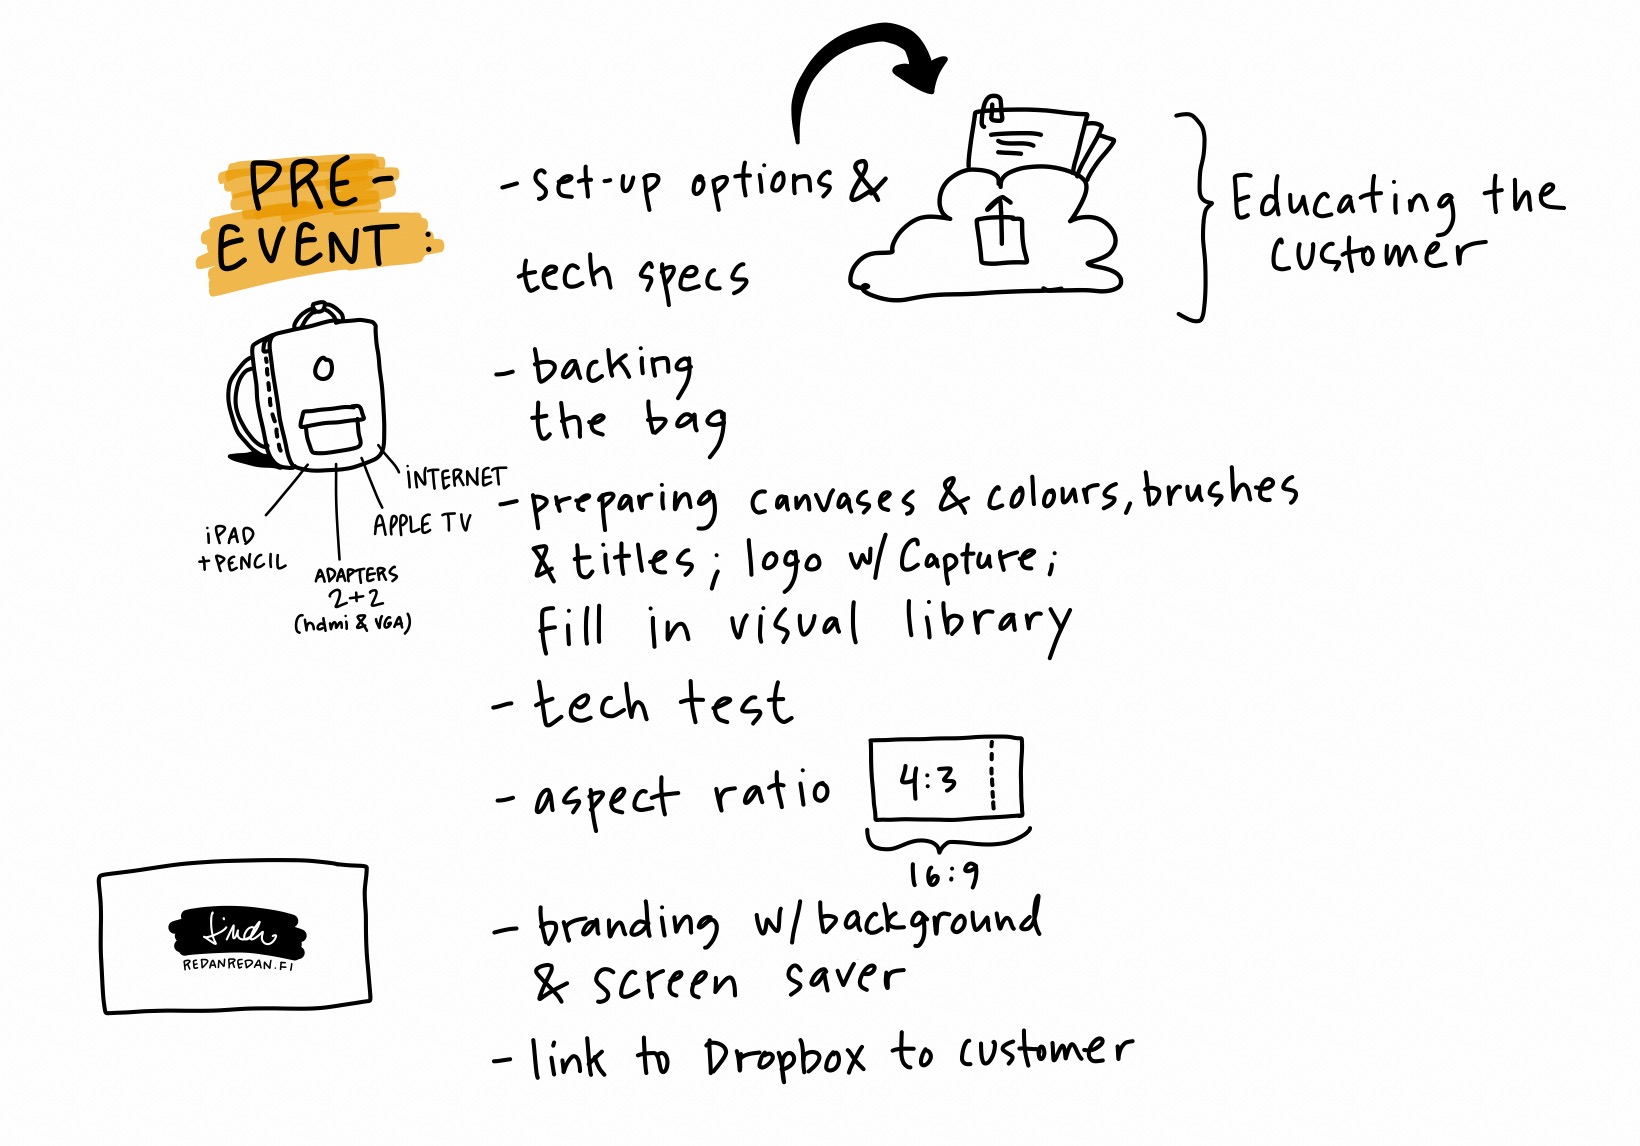
Before the event
Before the event I educate the client by sending them information about the way I work. In the pre-
brochure I’ve listed out various set-ups that we could use in the seminar hall depending on if we want to show my process real-time to the audience or not.
The day before the event I prepare my canvas, event titles, speaker names and company logos so that they’re all ready to be used during the event.
Aspect ratio is the thing that might cause some trouble (4:3 vs. 16:9) so I’ll have a chat and test with the tech crew.
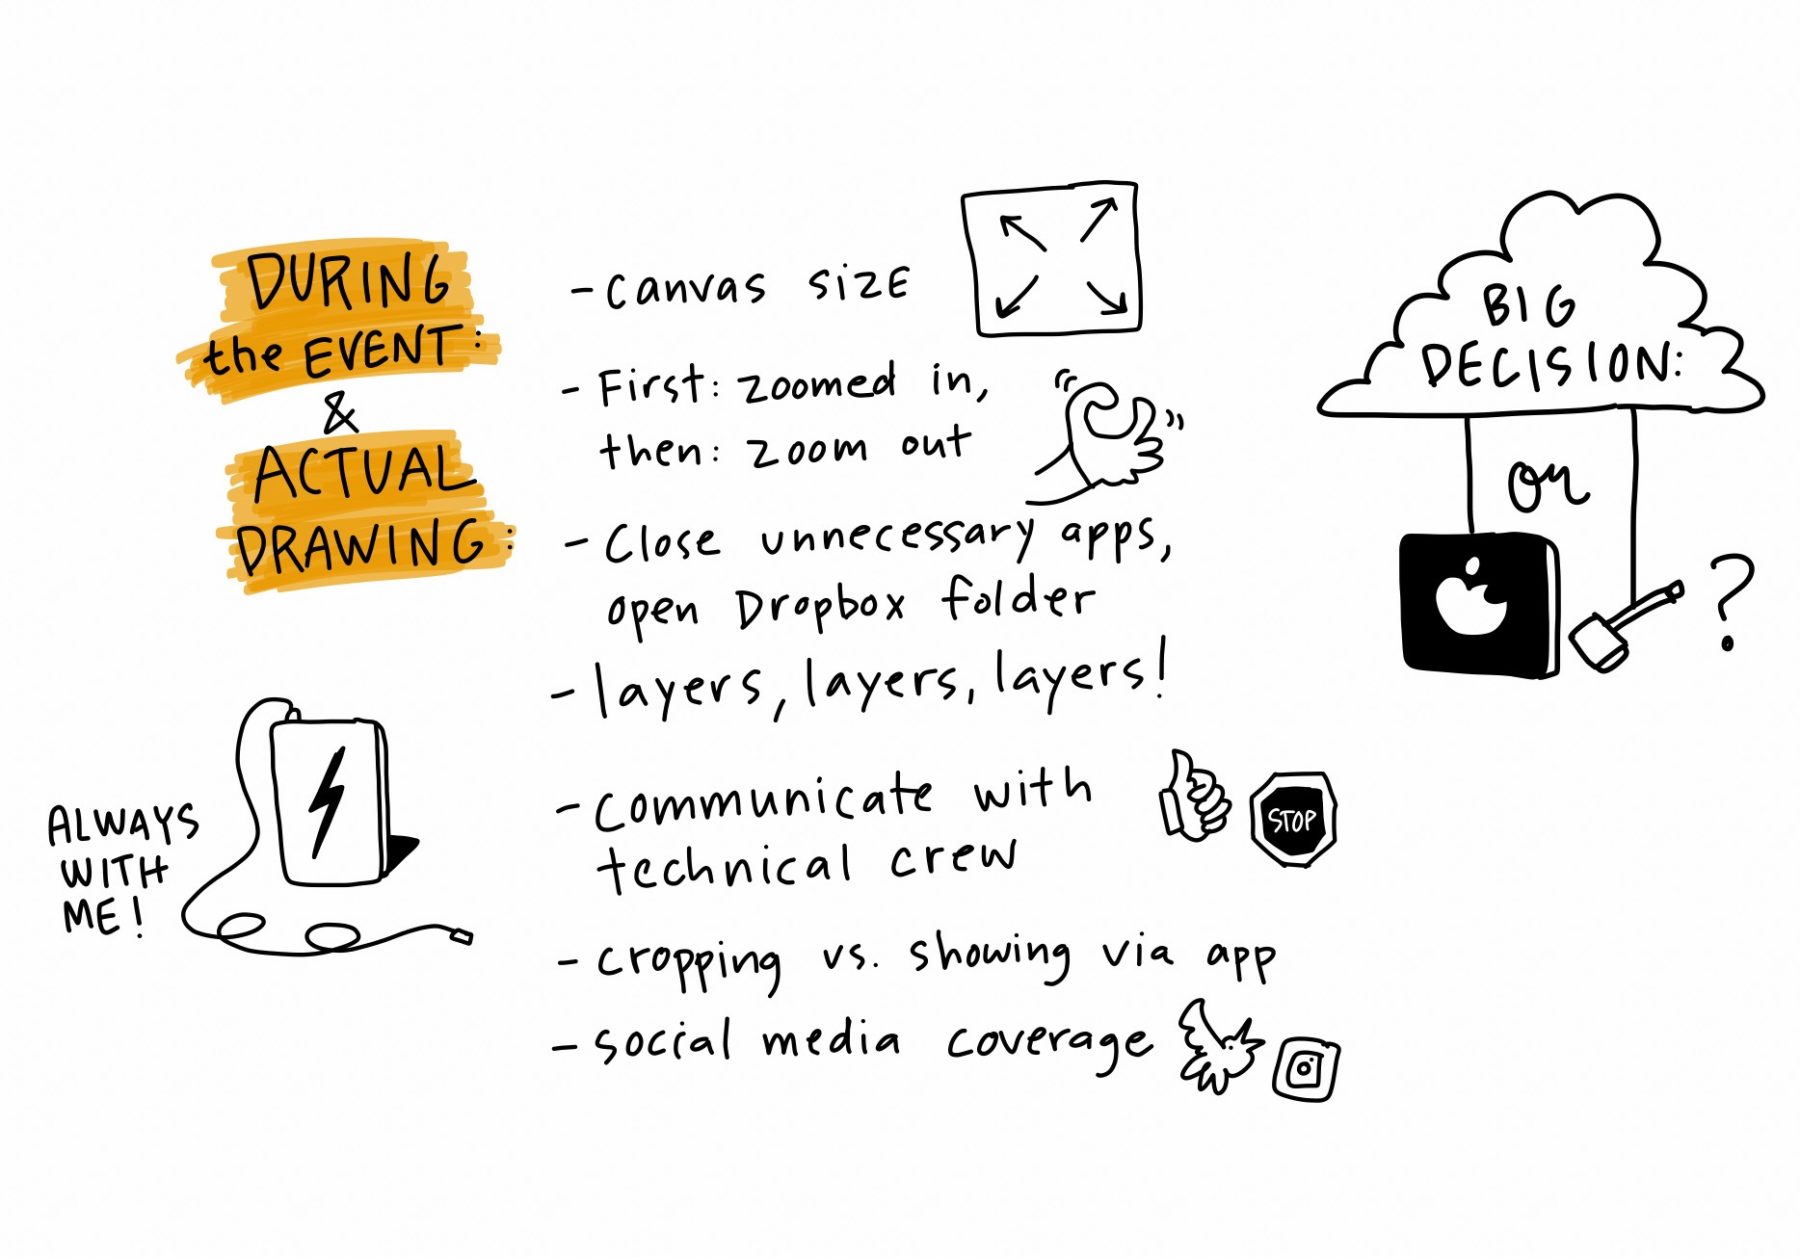
During the event
So, my iPad is ready, all the unnecessary apps are closed, Dropbox is all set up, we’re good to go. As said, I’ve prepared the canvases beforehand. A large canvas gives me freedom to work. By using a large canvas I don’t show the grey area outside the canvas to the audience. I start of by zooming tightly in and start working on the picture using layers. I reveal the bigger picture as we go. At times I might zoom out to show the audience where I’m at, at times I zoom in again so that both I and the audience can focus on details.
Sometimes the event organizers don’t want to show the process real-time – you know the usual explanations: “It takes the attention away from the speakers..!” Then we normally show the end result at the end of each presentation. If I’m fast – and I often am – I’ve time to push out a cropped jpg image with aspect ratio 16:9. That’s the format the tech crew loves because it fills out the screen nicely. Before we reveal the image to the audience I show the tech crew thumbs-up so that they know I’m ready with the picture. Communication!
I’ve given the customer a link to a Dropbox folder where I place the images right away as they’re finished. If I’m hooked up onto a projector, I upload the files during the break. It’s fast and that way the customer could use the images on social media already during the event.
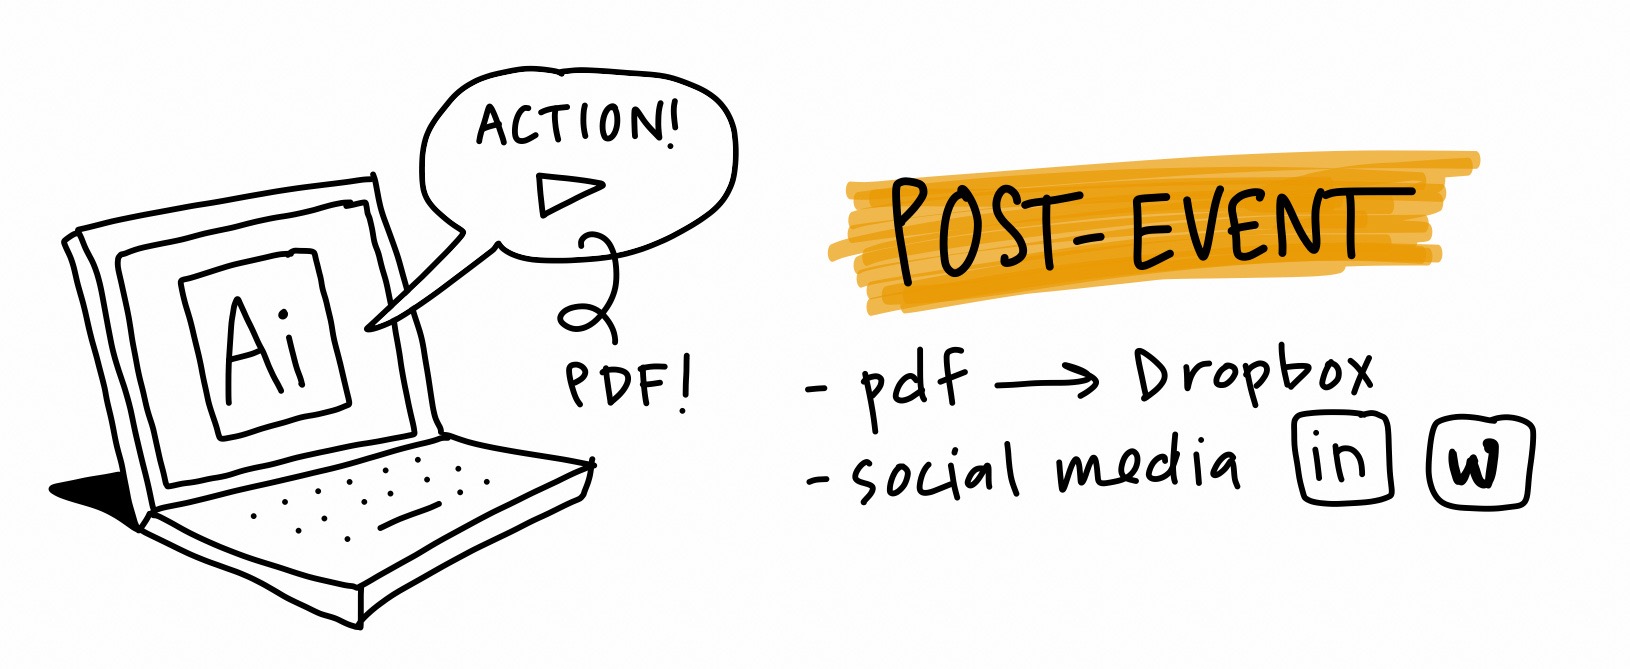
After the event
When I’m back in the home office I send Adobe Illustrator files from my iPad to Illustrator’s desktop version. I’ve created an action in the Illustrator that transforms the .ai files into .pdf’s and places them in a folder on my Dropbox – automatically. I recommend using actions because they make your workflow faster and more secure. No chance to making mistakes when the machine does the work for you.
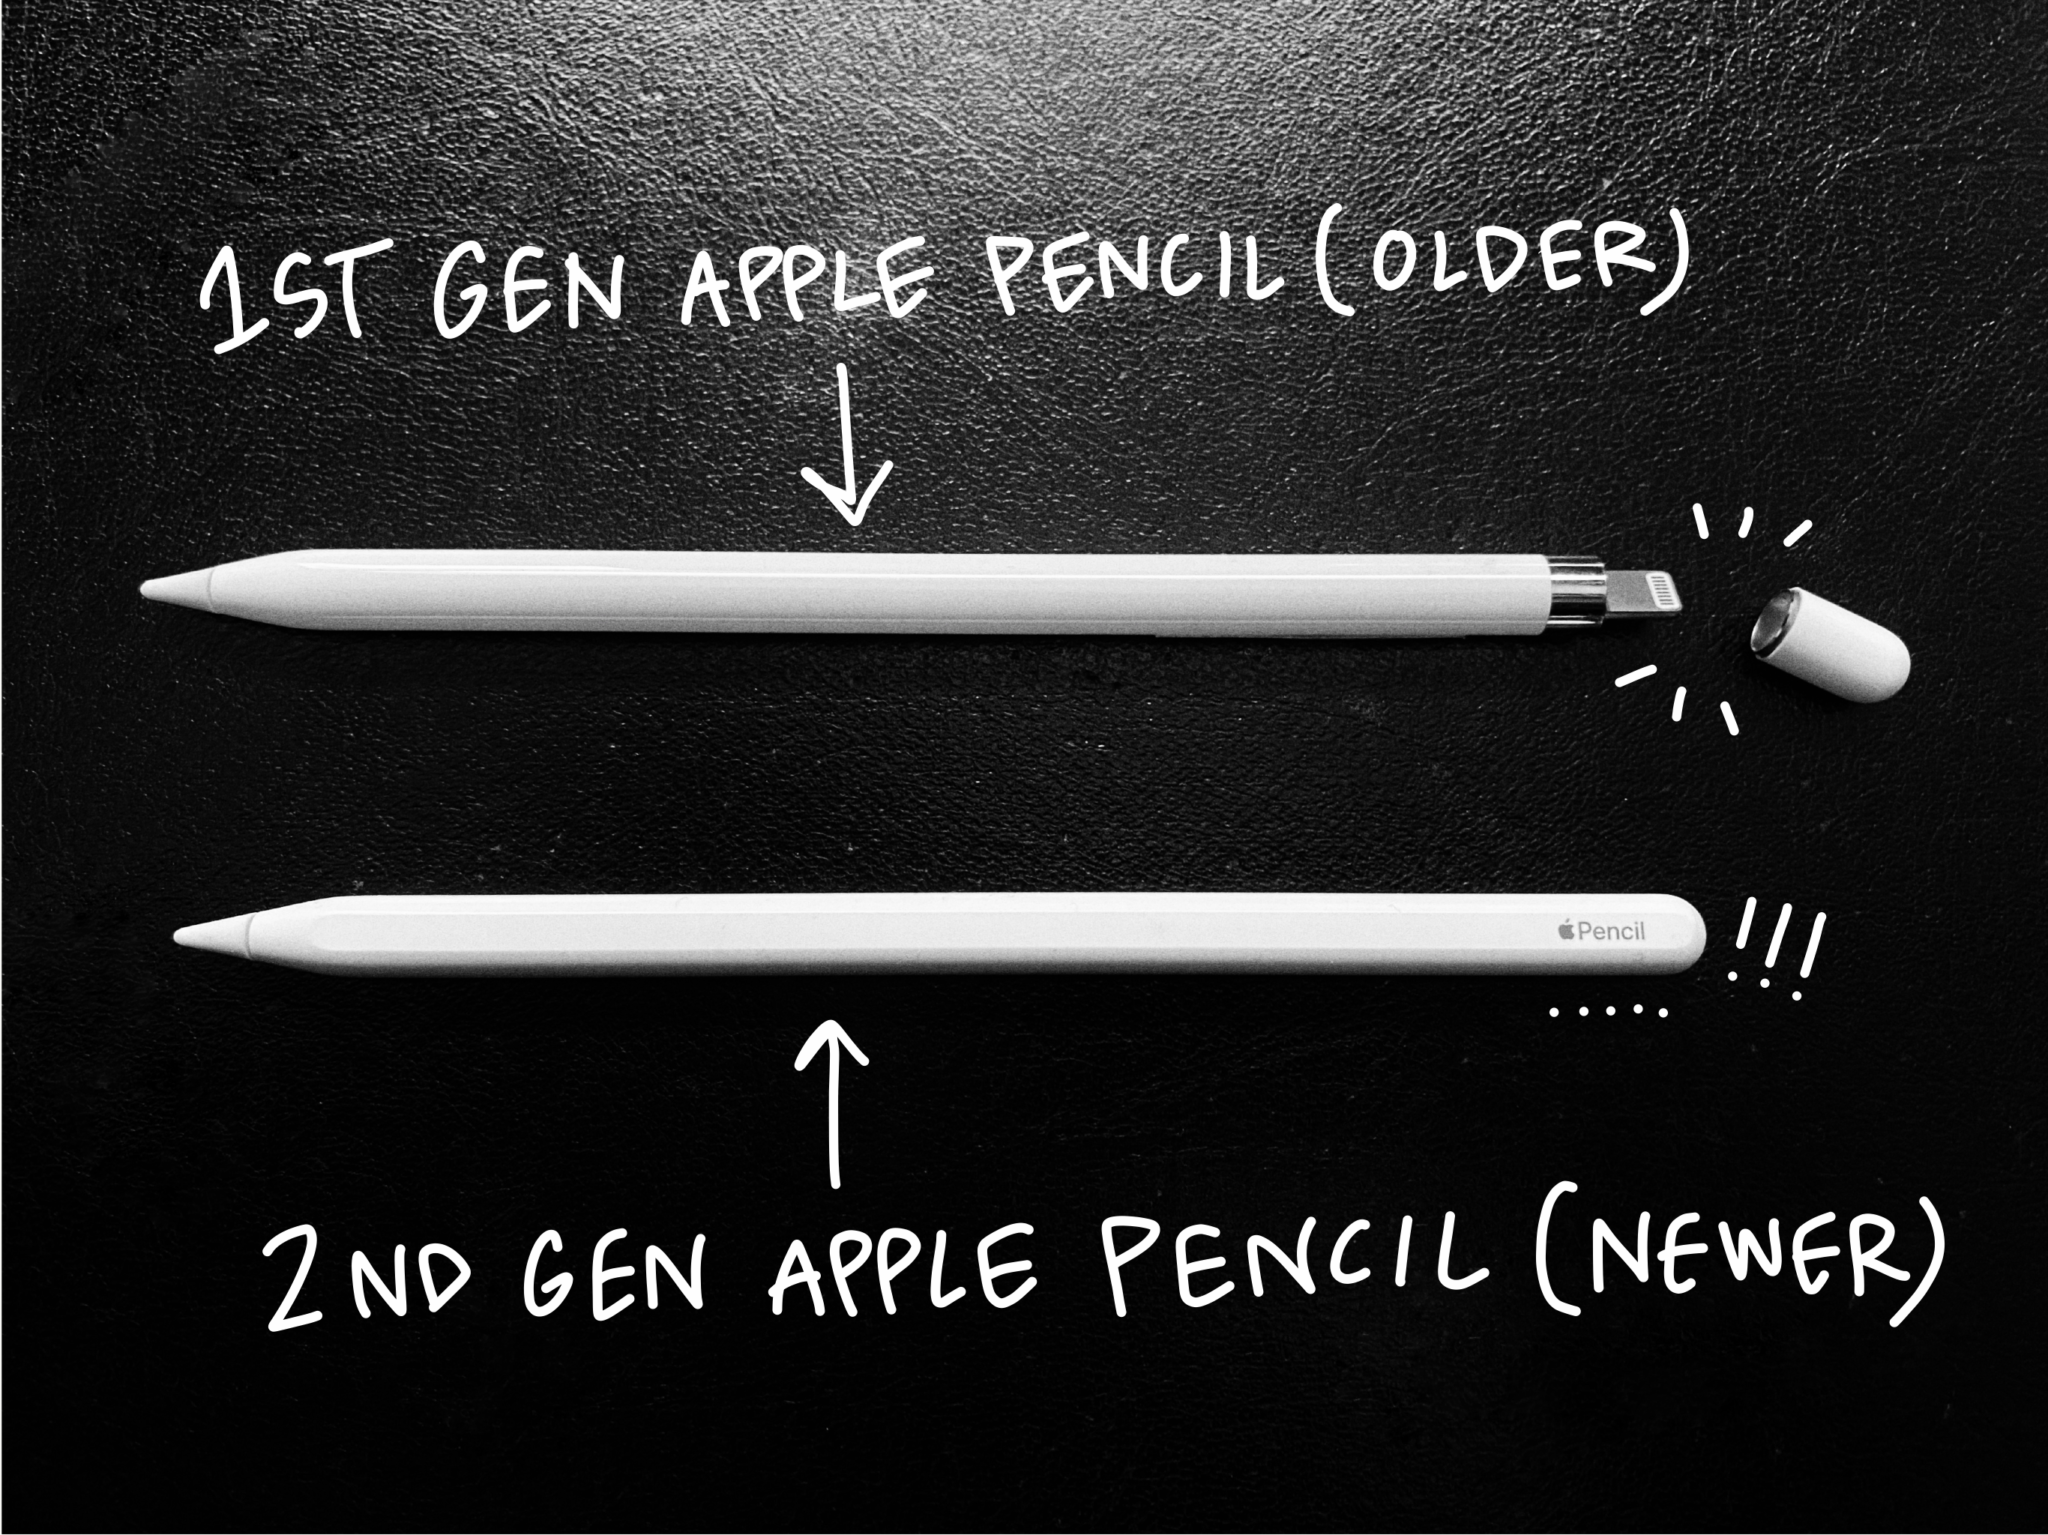
All in all I see that there are a lot of benefits in doing digital visual practitioning. It’s fast, it’s flexible and the end result is of good quality and easily sharable. I don’t have to carry around bags of pens or piles of papers, I’ve got just my iPad and the Apple Pencil – and a couple of adapters, cables, extra battery, Apple TV, charger and and and… It’s heavy to be the disruptor ;)
It takes some time to learn the tricks for digital real-time live graphic recording. The learning process requires that you test out, make mistakes and learn from them. “Oh, I accidentally had my Facebook page open while my iPad was projected real-time!” Next time you remember not to surf with your iPad during the gig. “Oh, my kid just sent me a message full of emojis and the whole seminar hall saw it!” Next time you tick off the iMessage option. “Oh, the wi-fi at the event venue was poor so my Apple TV and iPad lost their connection!” Next time you won’t even try to connect your iPad into the network because you’ve learned that the newest Apple TV gadgets and your iPad create a network of their own. And: “Oh, I had my Dropbox open so that the audience saw all my client projects from this year!” Well, that’s why you close all the other unnecessary apps and create a new Dropbox folder for the event so that nothing else can be seen on the screen.
To my mind, you have to challenge yourself to test out new tools and ways to work. Show mercy to yourself, it’s ok to fail. But fail fast – and learn. A good chance for me to challenge myself will be this summer as I need to test more the upcoming Adobe Gemini app; a drawing app that will replace Adobe Draw. Hopefully I could do digital graphic recording next autumn with this new app and its new tools.
Finally: if you’re fairly new to digital graphic recording in general, you might want to start by trying out some basic steps with your device. Here’s my previous blog post: Pro tips for a graphic recorder going digital – go and try.. and learn!
Written by
Linda Saukko-Rauta
Digital doer and doodler, iPad user since 2010
Redanredan.fi

Kirjoittaja
Linda Saukko-Rauta
Livekuvittaja ja yrittäjä
Oman elämänsä pilapiirtäjä ja sushirajan takana elelevä keski-ikäinen perheenäiti sekä sudeettipohjalainen, joka ei todellakaan rieku missään pilakuva- tai sarjisskenessä.